Have you ever wondered how to harness the full potency of medicinal herbs right in your own kitchen? Learning how to make a fluid extract is a powerful skill for any home herbalist or wellness enthusiast. This comprehensive guide will walk you through the process of creating a highly concentrated herbal preparation, often referred to as a 1:1 tincture, ensuring you capture the broadest spectrum of beneficial plant compounds for maximum therapeutic effect.
Understanding Fluid Extracts: The Gold Standard of Herbal Concentration 🌿
A fluid extract represents one of the most concentrated forms of tincture-based herbal preparations. Essentially, it’s a liquid extract standardized to a 1:1 ratio, meaning that 1 milliliter (ml) of the final liquid corresponds to 1 gram (g) of the original dried plant material. This high concentration is a game-changer, especially for those seeking potent natural remedies and supplements.
In professional and commercial settings, achieving such a precise concentration often involves advanced extraction methods like percolation. However, the good news is that you can achieve similar results at home through a patient, yet highly effective, method called triple maceration. While it requires a significant time commitment – typically around 12 weeks – the payoff is a robust and versatile herbal medicine.
The primary advantage of using fluid extracts in wellness practices is the ability to deliver a therapeutic dose in a smaller volume. This not only makes them easier to consume but also opens up more possibilities for creating complex multi-herb formulations, often referred to as polypharmacy, where various herbs can work synergistically to address specific health concerns.
The Science Behind the Extraction: Why Hydroethanolic Solvents Work Best 💪
When it comes to extracting the full spectrum of medicinal constituents from plants, Western herbal practitioners predominantly favor hydroethanolic solvents – a combination of ethanol (alcohol) and water. This is not arbitrary; it’s based on the diverse chemical properties of plant compounds.
- Water-soluble compounds: Many beneficial compounds, such as polysaccharides, certain minerals, and mucilage, are highly polar and readily dissolve in water.
- Alcohol-soluble compounds: Conversely, less polar compounds like resins, alkaloids, flavonoids, and coumarins require ethanol for effective extraction.
By using a balanced hydroethanolic solution, typically around 45% alcohol strength, you ensure that both water-soluble and alcohol-soluble compounds are extracted. This results in a broad-spectrum tincture that truly captures the plant’s full medicinal essence. Research suggests that this method provides the greatest breadth of the plant’s therapeutic potential.
Key Compounds Extracted with a 45% Alcohol Solution:
A 45% alcohol solution is ideal for extracting a wide array of plant compounds, including:
- Tannins: Known for their astringent properties, beneficial for tissue toning.
- Polysaccharides: Often immune-modulating and gut-supportive.
- Mucilage: Soothing and demulcent, excellent for mucous membranes.
- Minerals: Essential micronutrients vital for various bodily functions.
- Phenolic acids: Powerful antioxidants with anti-inflammatory effects.
- Flavonoids: Antioxidants that support cellular health and reduce oxidative stress.
- Glycosides: Diverse compounds with various physiological actions, depending on the plant.
- Alkaloids: Often highly potent compounds responsible for specific therapeutic actions.
- Bitters: Stimulate digestive secretions and support liver function.
- Coumarins: May have anti-inflammatory and anticoagulant properties.
- Saponins: Can have expectorant, anti-inflammatory, and immune-stimulating effects.
For those interested in the intricate world of cellular wellness and how these compounds interact, exploring new discoveries in cellular wellness and natural support can provide deeper insights.
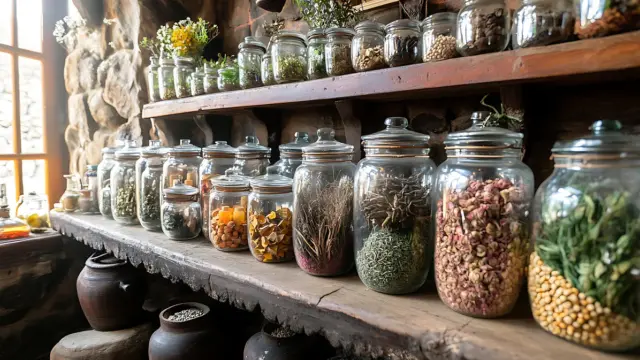
Gathering Your Tools: What You’ll Need for Your Fluid Extract Journey 🛠️
Embarking on the creation of a homemade fluid extract is a rewarding endeavor. While the process is straightforward, having the right ingredients and equipment is crucial. This recipe is designed to yield approximately one liter of fluid extract, but you can easily adjust the quantities to suit your needs.
Ingredients:
- 1200 ml of 45% strength alcohol: High-quality vodka is the most commonly used and readily available option for home herbalists. Ensure it’s 80 proof (40% alcohol) or slightly higher to achieve the desired 45% final concentration after accounting for the herb’s moisture and any water added. Some herbalists prefer to start with a higher proof alcohol and dilute it, but 40-45% is generally effective for broad-spectrum extraction.
- 1 kg dried herb: This should be divided into three equal batches of approximately 333 grams each. The quality of your dried herb is paramount. Source from reputable suppliers to ensure purity and potency.
Equipment:
- 2–3 liter glass Kilner jar (or similar airtight glass jar): This will be your primary maceration vessel. Its airtight seal is important to prevent evaporation of the alcohol.
- Muslin cloth or cheesecloth: Essential for straining the plant material from the liquid.
- Funnel: For easy pouring and bottling of the finished extract.
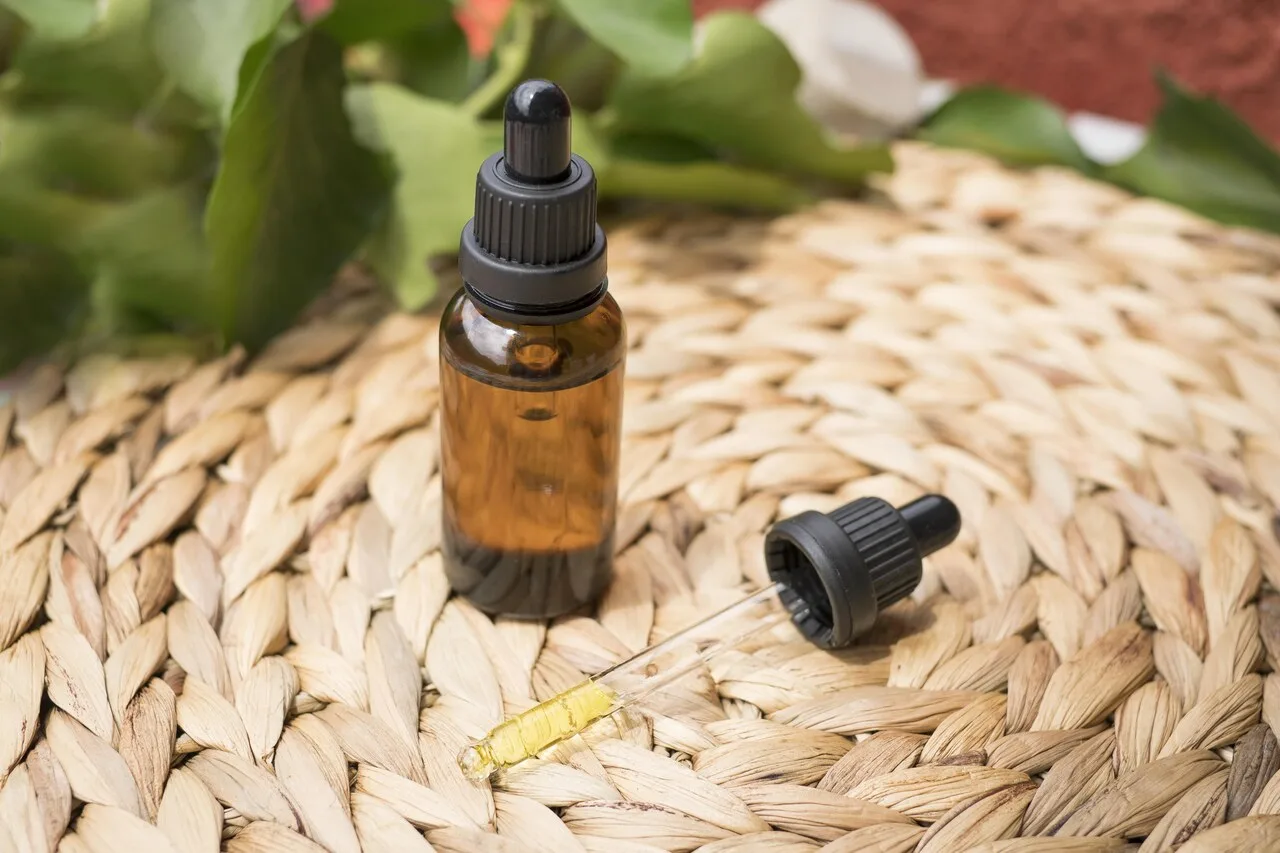
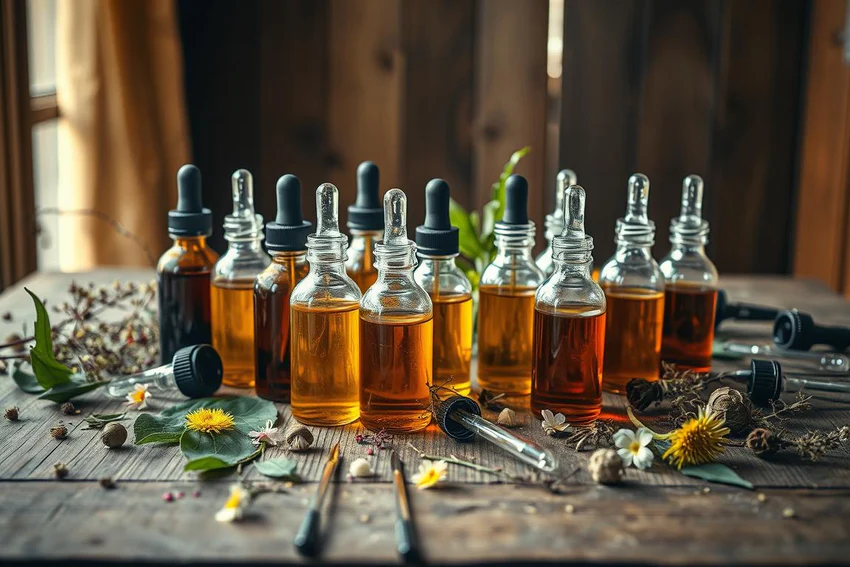
- Amber glass storage bottles: These are crucial for protecting your finished fluid extract from light degradation, which can diminish the potency of delicate plant compounds. Various sizes are useful for dispensing.
- Measuring cups and spoons: For accurate measurement of ingredients.
- Labels: Don’t underestimate the importance of clear labeling with the herb name, alcohol percentage, and date of creation.
Step-by-Step Guide: How to Make a Fluid Extract at Home ⏳
This method utilizes a triple maceration process, which involves steeping the herb material in the same menstruum (solvent) multiple times. This technique progressively saturates the solvent with plant compounds, leading to a highly concentrated fluid extract. The total process spans approximately 12 weeks, requiring patience but yielding excellent results.
- First Maceration (Weeks 1-4):
- Place the first 333g batch of dried herb material into your clean 2-3 liter glass jar.
- Pour 1200 ml of 45% strength alcohol over the herb. Ensure the herb is fully submerged. If not, gently press it down with a clean utensil.
- Seal the jar tightly and label it clearly with the herb name and start date.
- Store the jar in a cool, dark place, away from direct sunlight.
- For the next 3-4 weeks, stir or shake the jar regularly, ideally once a day. This helps to ensure even extraction and prevents the herb from settling too much.
- Straining the First Maceration:
- After 3-4 weeks, prepare to strain. Place a muslin cloth inside a funnel, and position it over a clean bowl or another large container.
- Pour the entire contents of the jar (herb and liquid) into the muslin-lined funnel.
- Allow the liquid to drain naturally. Once most of the liquid has passed through, gather the edges of the muslin cloth and squeeze the herb material firmly to extract as much liquid as possible. This liquid is your retained alcohol extraction.
- Discard the spent herb material from the first batch.
- Second Maceration (Weeks 5-8):
- Measure out your second batch of 333g dried herb material.
- Place this fresh herb into the original, now empty, glass jar.
- Pour the retained alcohol extraction (the liquid you just strained from the first batch) over this new herb material. Ensure full submersion.
- Seal and label the jar again.
- Repeat the maceration process for another 3-4 weeks, stirring or shaking daily.
- Straining the Second Maceration:
- After 3-4 weeks, repeat the straining process exactly as you did for the first batch, using a clean muslin cloth.
- Retain all the liquid. This liquid is now even more concentrated.
- Discard the spent herb material from the second batch.
- Third Maceration (Weeks 9-12):
- Measure out your third and final batch of 333g dried herb material.
- Place this fresh herb into the clean glass jar.
- Pour the highly concentrated retained alcohol extraction (from the second batch) over this final herb material. Ensure full submersion.
- Seal and label the jar.
- Macerate for the final 3-4 weeks, continuing to stir or shake daily.
- Final Straining and Bottling:
- After the final 3-4 weeks, strain the maceration for the last time, using a clean muslin cloth. Squeeze thoroughly to extract every last drop of your precious fluid extract.
- This final liquid is your highly concentrated 1:1 fluid extract.
- Using a funnel, carefully bottle the fluid extract into amber glass storage bottles. Fill them as full as possible to minimize air exposure.
- Label each bottle clearly with the herb name, date of completion, and the 1:1 fluid extract ratio.
Practical Tips for Successful Fluid Extract Making ✨
Creating a fluid extract is a rewarding process, but attention to detail can make all the difference. Here are some practical tips to ensure your success and the longevity of your homemade remedies.
- Quality of Ingredients Matters: Always start with high-quality, organic, and ethically sourced dried herbs. The potency of your final product directly depends on the quality of your raw materials.
- Accurate Alcohol Percentage: While 40% vodka is a good starting point, confirm your alcohol strength. If you need to adjust, you can dilute stronger alcohol with distilled water. Consistency in alcohol percentage ensures optimal extraction of diverse compounds.
- Proper Submersion: It’s critical that all herb material remains submerged in the alcohol during maceration. Any exposed herb can potentially mold or degrade. Use a clean weight (like a smaller glass jar filled with water) if necessary to keep the herbs pressed down.
- Consistent Agitation: Regular shaking or stirring isn’t just a suggestion; it’s vital. This action helps to break down plant cell walls, ensuring that the solvent comes into contact with all the herbal constituents and facilitates a more thorough extraction.
- Dark Storage is Key: Light, especially UV light, can degrade the delicate compounds in your fluid extract. Always store your macerating jars and finished bottles in a cool, dark place. Amber glass bottles are specifically designed to block harmful light.
- Label Everything Clearly: This cannot be stressed enough. Labels should include the herb name, the date you started the maceration, the alcohol percentage, and the date of bottling. This prevents confusion and helps you track the potency and shelf life.
- Cleanliness is Paramount: Ensure all your equipment – jars, funnels, muslin cloth, and bottles – are meticulously clean and sterilized before use to prevent contamination and the growth of unwanted microbes.
- Patience is a Virtue: The 12-week triple maceration process requires patience. Resist the urge to rush it. The extended steeping time is what allows for the comprehensive extraction that defines a true fluid extract.
- Test for Potency and Safety: Before consuming, always check your finished tincture for any signs of mold, off-smells, or unusual discoloration. While the alcohol acts as a preservative, vigilance is always recommended.
- Consult a Professional: While making your own remedies is empowering, always consult with a qualified healthcare professional or an experienced herbalist, especially if you are pregnant, nursing, taking medications, or have underlying health conditions. They can provide personalized advice on appropriate herbs and dosages.
Storing Your Homemade Fluid Extract: Maximizing Shelf Life 💧
Proper storage is essential to maintain the potency and extend the shelf life of your homemade fluid extract. Given its high alcohol content (45%), your extract will have a considerably long shelf life, often several years, when stored correctly.
- Amber Glass Bottles: As mentioned, always bottle your finished extract into amber glass. The dark color protects the delicate plant compounds from degradation caused by light exposure.
- Cool, Dark Place: Store your bottles in a cool, dark cupboard or pantry, away from direct sunlight, heat sources, and extreme temperature fluctuations. A consistent, cool temperature helps preserve the integrity of the herbal constituents.
- Airtight Seal: Ensure your bottles have tightly fitting caps to prevent evaporation of the alcohol. Evaporation can alter the concentration and reduce the preservative effect.
- Regular Checks: Although the alcohol acts as a preservative, it’s always wise to visually inspect your fluid extract periodically. Look for any signs of mold, cloudiness, or changes in smell or taste that might indicate spoilage. If you notice anything unusual, it’s best to err on the side of caution and discard the batch.
Properly stored, your fluid extract can be a valuable addition to your natural remedies and supplements collection for years to come.
Frequently Asked Questions about Fluid Extracts 🧠
How long does it take to make a fluid extract using this method?
This homemade triple maceration method for making a fluid extract takes approximately 12 weeks in total. This includes three separate 3-4 week maceration periods, each followed by straining and transferring the liquid to fresh herb material.
Can I use fresh herbs instead of dried herbs for this recipe?
This specific recipe is designed for dried herbs, which contain less moisture and result in a more concentrated extract when using the 1:1 ratio. Using fresh herbs would significantly alter the herb-to-solvent ratio due to their high water content, requiring adjustments to the alcohol percentage and overall process. For a 1:1 fluid extract, dried herbs are recommended to maintain consistency and potency.
Is it safe to consume homemade fluid extracts?
Homemade fluid extracts can be a safe and effective way to utilize natural remedies, provided they are made correctly with high-quality ingredients and proper sanitation. However, it’s crucial to identify your herbs accurately, understand their properties, and use appropriate dosages. Always consult with a qualified healthcare professional or an experienced herbalist before using any herbal preparations, especially if you have underlying health conditions, are pregnant, nursing, or taking other medications. They can offer personalized guidance on safety and efficacy.
What is the shelf life of a homemade fluid extract?
Thanks to its 45% alcohol content, a properly made and stored fluid extract can have a very long shelf life, often several years (e.g., 3-5 years or even longer). Storing it in amber glass bottles in a cool, dark place with an airtight seal is crucial for maximizing its longevity and preserving its potency.
Key Takeaways: Mastering Your Homemade Fluid Extract ❤️
- A fluid extract is a highly concentrated herbal preparation, typically standardized to a 1:1 herb-to-liquid ratio, offering potent therapeutic doses in small volumes.
- The homemade method described utilizes a triple maceration process over approximately 12 weeks, making it accessible for home herbalists.
- A hydroethanolic solvent (45% alcohol) is crucial for extracting a broad spectrum of plant compounds, including both water-soluble (e.g., polysaccharides) and alcohol-soluble (e.g., alkaloids, flavonoids) constituents.
- Quality ingredients (1 kg dried herb, 1200 ml 45% alcohol) and proper equipment (Kilner jar, muslin, amber bottles) are essential for success.
- Patience, consistent agitation, and proper dark storage are key to achieving a potent and stable fluid extract.
- Always ensure meticulous cleanliness throughout the process to prevent contamination.
- Despite the preservative qualities of alcohol, always inspect your extract for signs of spoilage before use.
- Consult a healthcare professional or experienced herbalist for personalized advice on herbal remedies, especially if you have health conditions or are on medication.
- This method empowers you to create potent natural remedies and supplements, enhancing your journey towards unlocking your wellness blueprint.
The Bottom Line
Learning how to make a fluid extract is a foundational skill for anyone serious about natural remedies and supplements. While it requires a commitment of time and patience, the reward is a highly concentrated, potent herbal preparation that can be a cornerstone of your wellness routine. By following this detailed guide, you can confidently create your own broad-spectrum fluid extracts, harnessing the full power of medicinal plants. Remember, the journey of herbalism is one of continuous learning and respect for nature’s wisdom. Always prioritize safety, quality, and professional guidance as you explore the incredible world of herbal medicine.
Sources:
- Concentrated tincture-based extraction: Making a homemade fluid extract
- New Insights on Water or Ethanol-Water Plant Extracts — PMC / NIH
How Healthy Are Your Habits?
10 quick questions · Get your personal wellness score